REVIEW: Aluminess E350 Rear Bumper

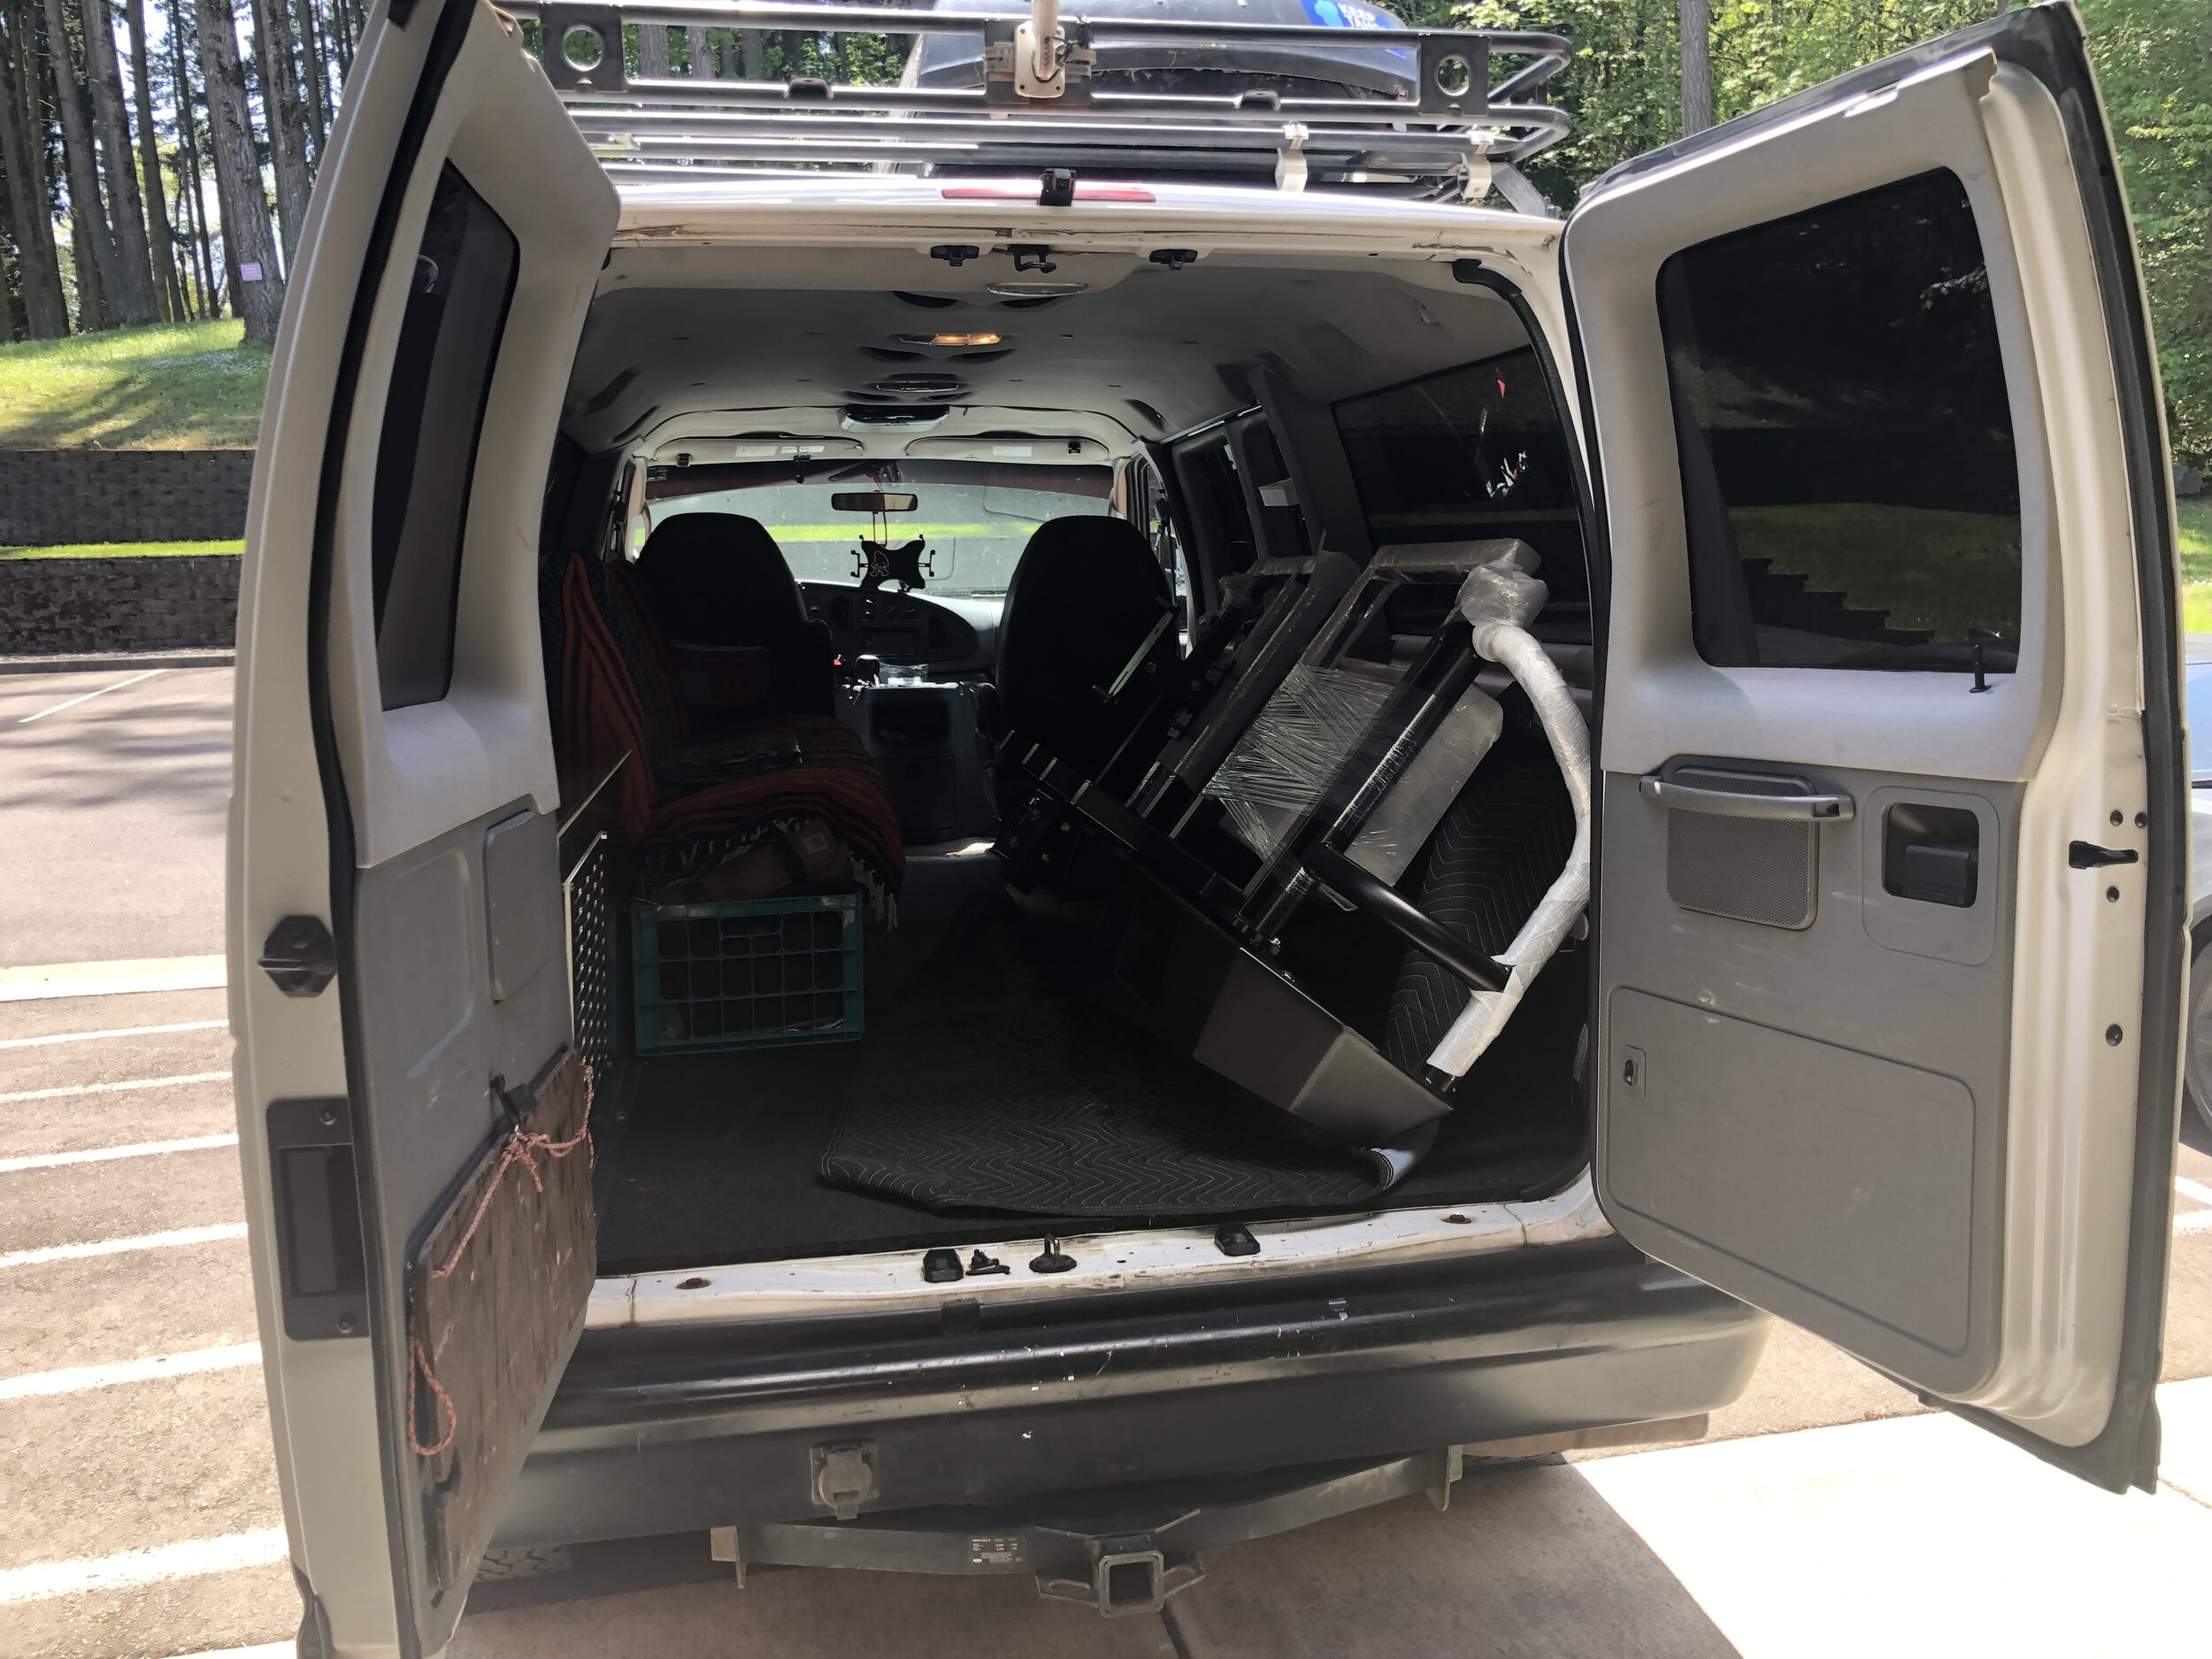
The new Aluminess rear bumper lookin’ fresh in the California Redwoods!
As our adVANtures got more involved and longer over the past 4 years Morgan and I started to find a need for more storage and a way to carry a full size spare tire. I know, I know. How can you possibly run out of room in that big ol’ van? While we could go for the minimalist route, a family of 2 adults and some dogs with bikes, kayaks, iSUPs, coolers, and enough beverages to last the trip can take up a good amount of space. I’ll also highlight the fact that we’ve started to put ourselves in some more sticky situations, so the need for a full size spare was becoming more necessary. Either way, we’d been drooling over the idea of an Aluminess Rear Bumper and finally pulled the trigger the Spring of 2019 before all our trips kicked off.
I reached out to Aluminess in SoCal to coordinate the shipment of an e350 Rear Bumper with swing arms and after a little back and forth to iron out the details for shipping and payment everything was set. If you have a friend that works at a warehouse with a loading dock, try to connect with them and you’ll save a bit on your shipping. There was a slight backorder, but it was worth the wait! The box that arrived was huge and I felt like a kid at Christmas! I made room in the van to take it home and was actually able to lift it all by myself. I was really surprised, but the bumper with the storage box is only about 75ish lbs.!!


Installation:
Day 1 (Bumper): To start I had to remove the original bumper which ended up being a nice quick 101 on what went where after honestly not sticking my head under there in a while. Taking off the old bumper was pretty quick and easy with an adjustable wrench and a socket set. (The old bumper has since been hiding in some bushes in my front yard, so if you know anyone needing a stock e350 bumper feel free to reach out!)
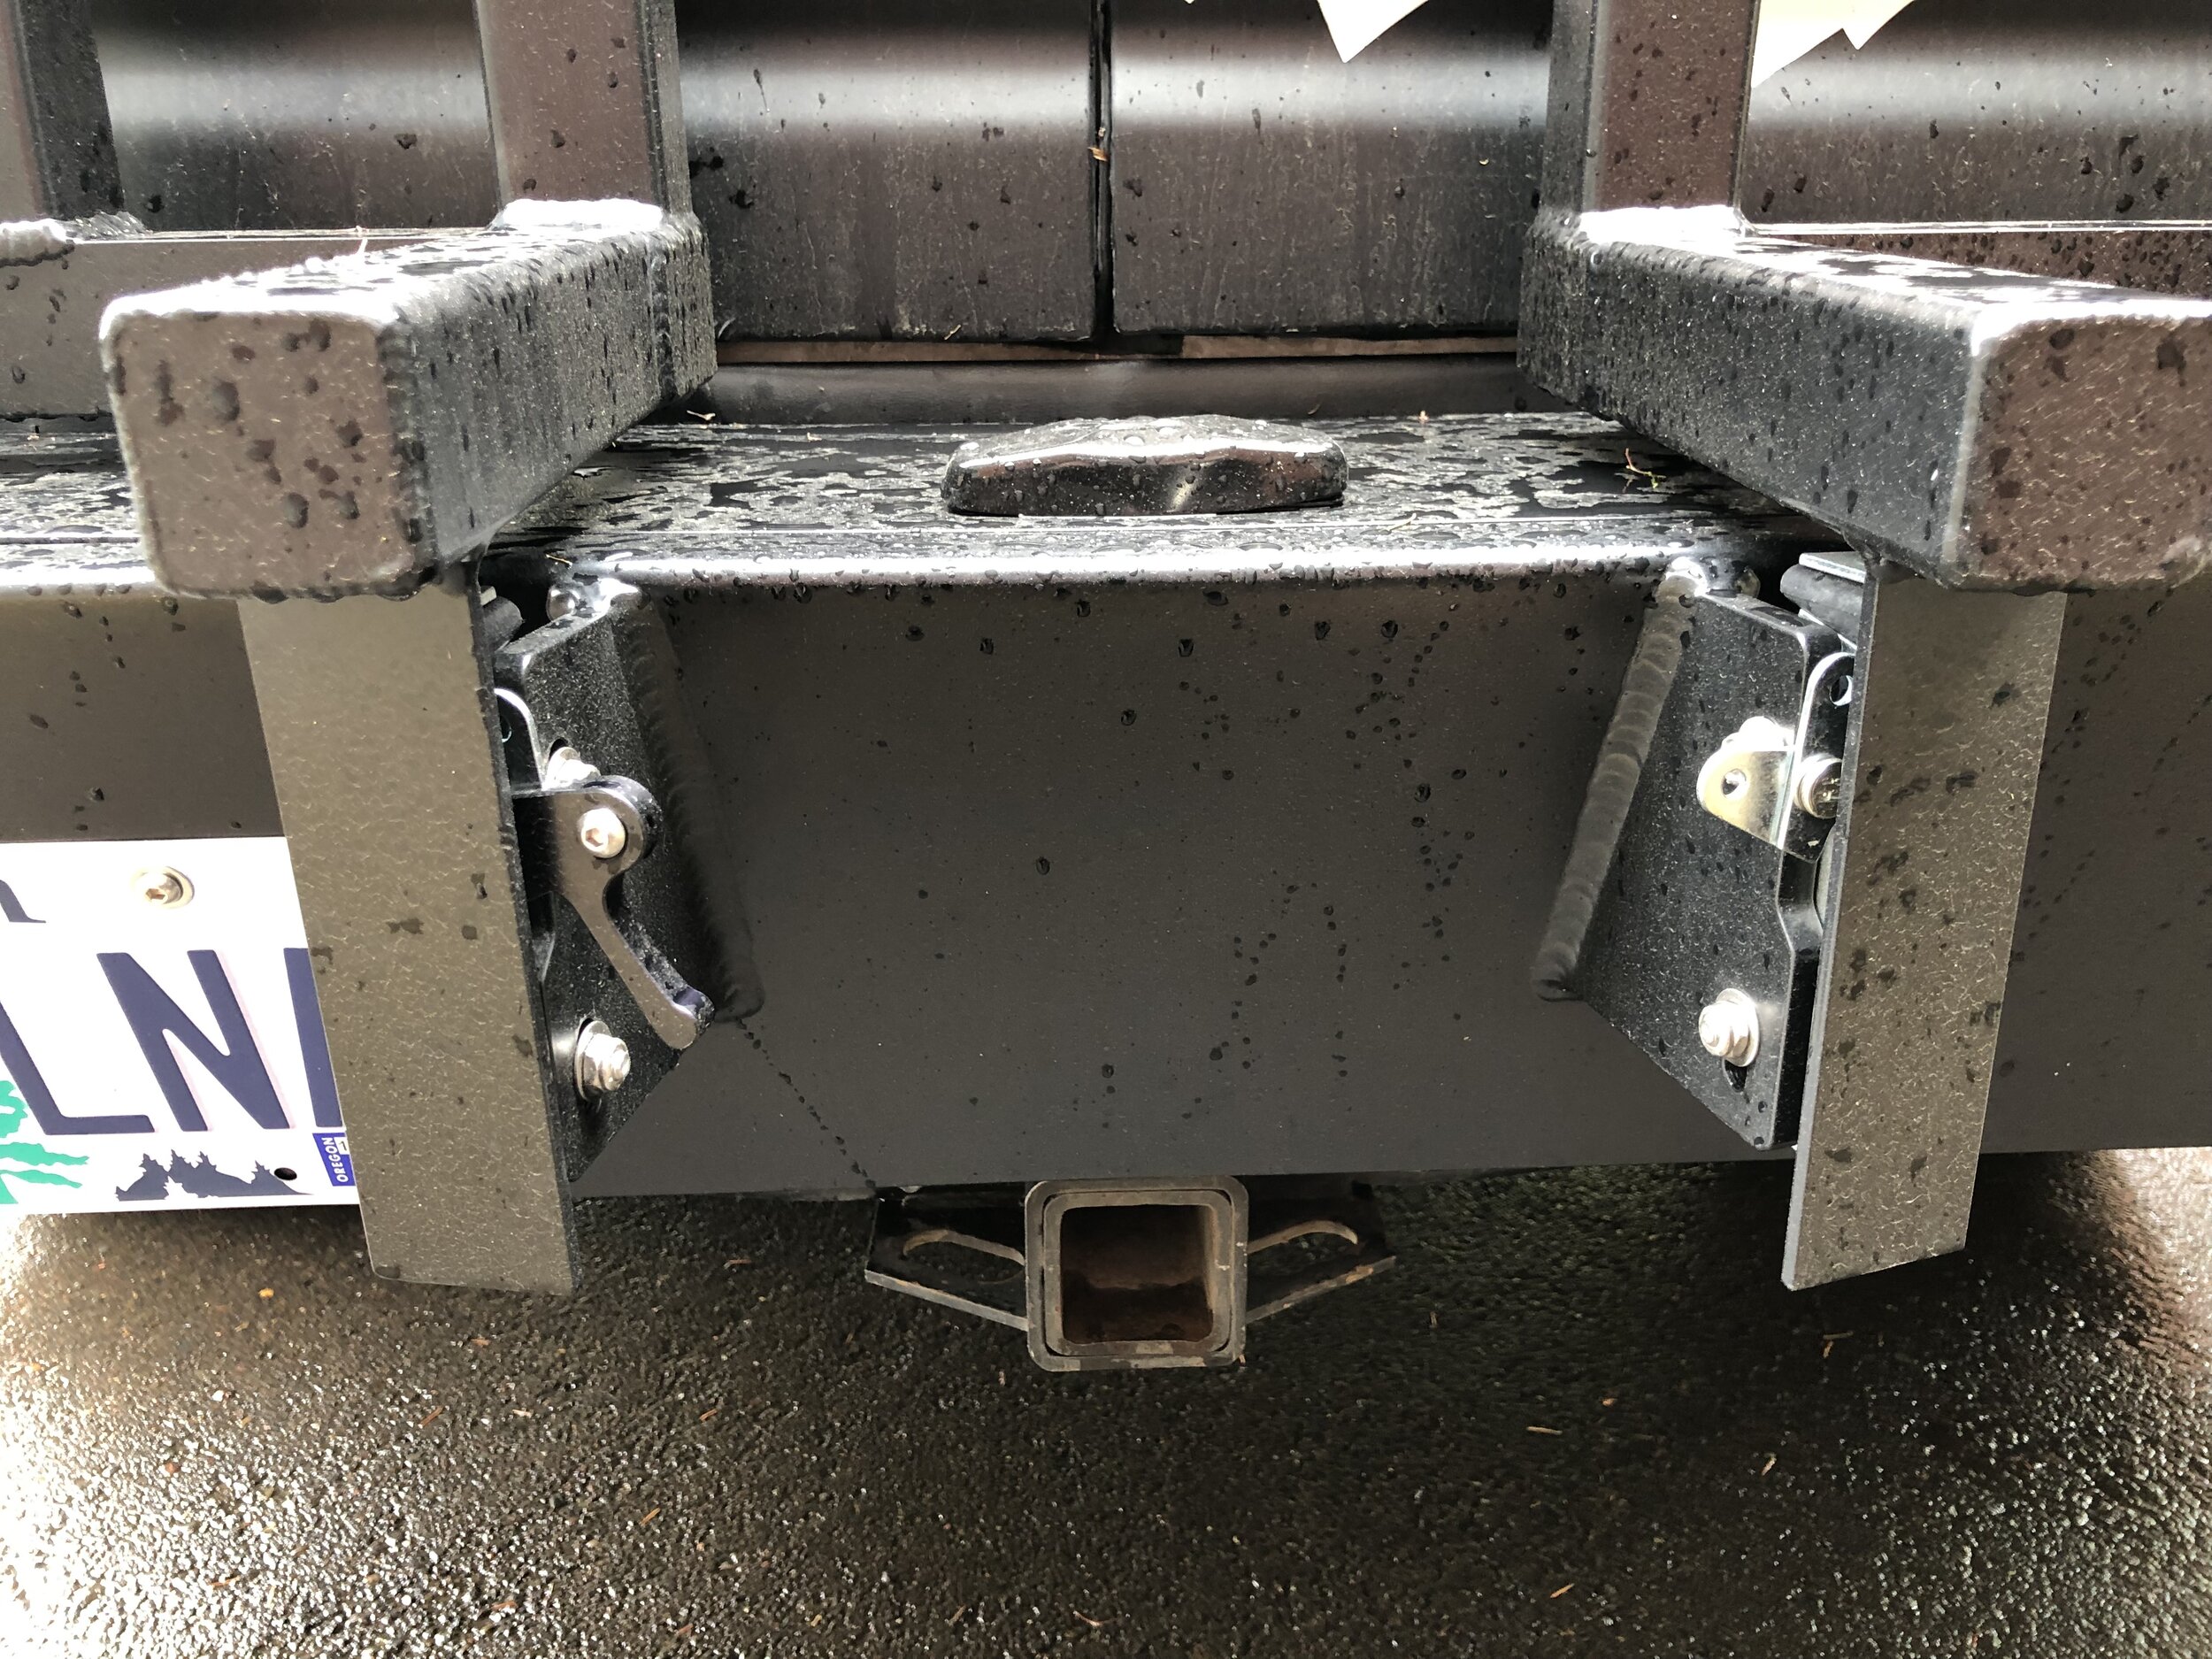
The Yeti looked a little funny with a naked rear end, so it was time to get to work. I gave the instructions a review and it turned out that some essential and proprietary hardware that I couldn’t just get at Home Depot wasn’t included, so I gave Aluminess a call and their trusty staff got some headed my way overnight. I read the instructions again that night and found a little tidbit about using an air chisel to remove some rear door hinge pins which would later accommodate the support straps for the bumper with the specialty hardware.

The original hardware without the required hinge support strap bolts.
Day 2 (Bumper): The specific hardware hadn’t yet arrived, so I thought I would give a try at removing the door hinge pins with a hammer and tool that was narrow enough to tap the bolt. I spent a few minutes banging away, but it just wasn’t budging. After a quick trip to the hardware store for an air tank and air chisel the pins only took a minute or two to remove. Since there wasn’t any weight on the bumper yet I moved forward with the install knowing the hardware for connecting the support straps to the body would be delivered within the next couple hours.
I started the process of bolting the new bumper to the frame and everything was pretty straight forward. I tightened all the bolts in a circular fashion similar to installing a tire to make sure it was evenly tightened with the included anti-seize on the threads. I was actually able to do this solo besides the assistance of a camp chair to support one side while I got the bolts started on the other. Once the hardware showed up, I was able to connect the support straps connecting the bumper to the upper rear door hinge. From there it was 90% complete with only the tire mount and box installation remaining.
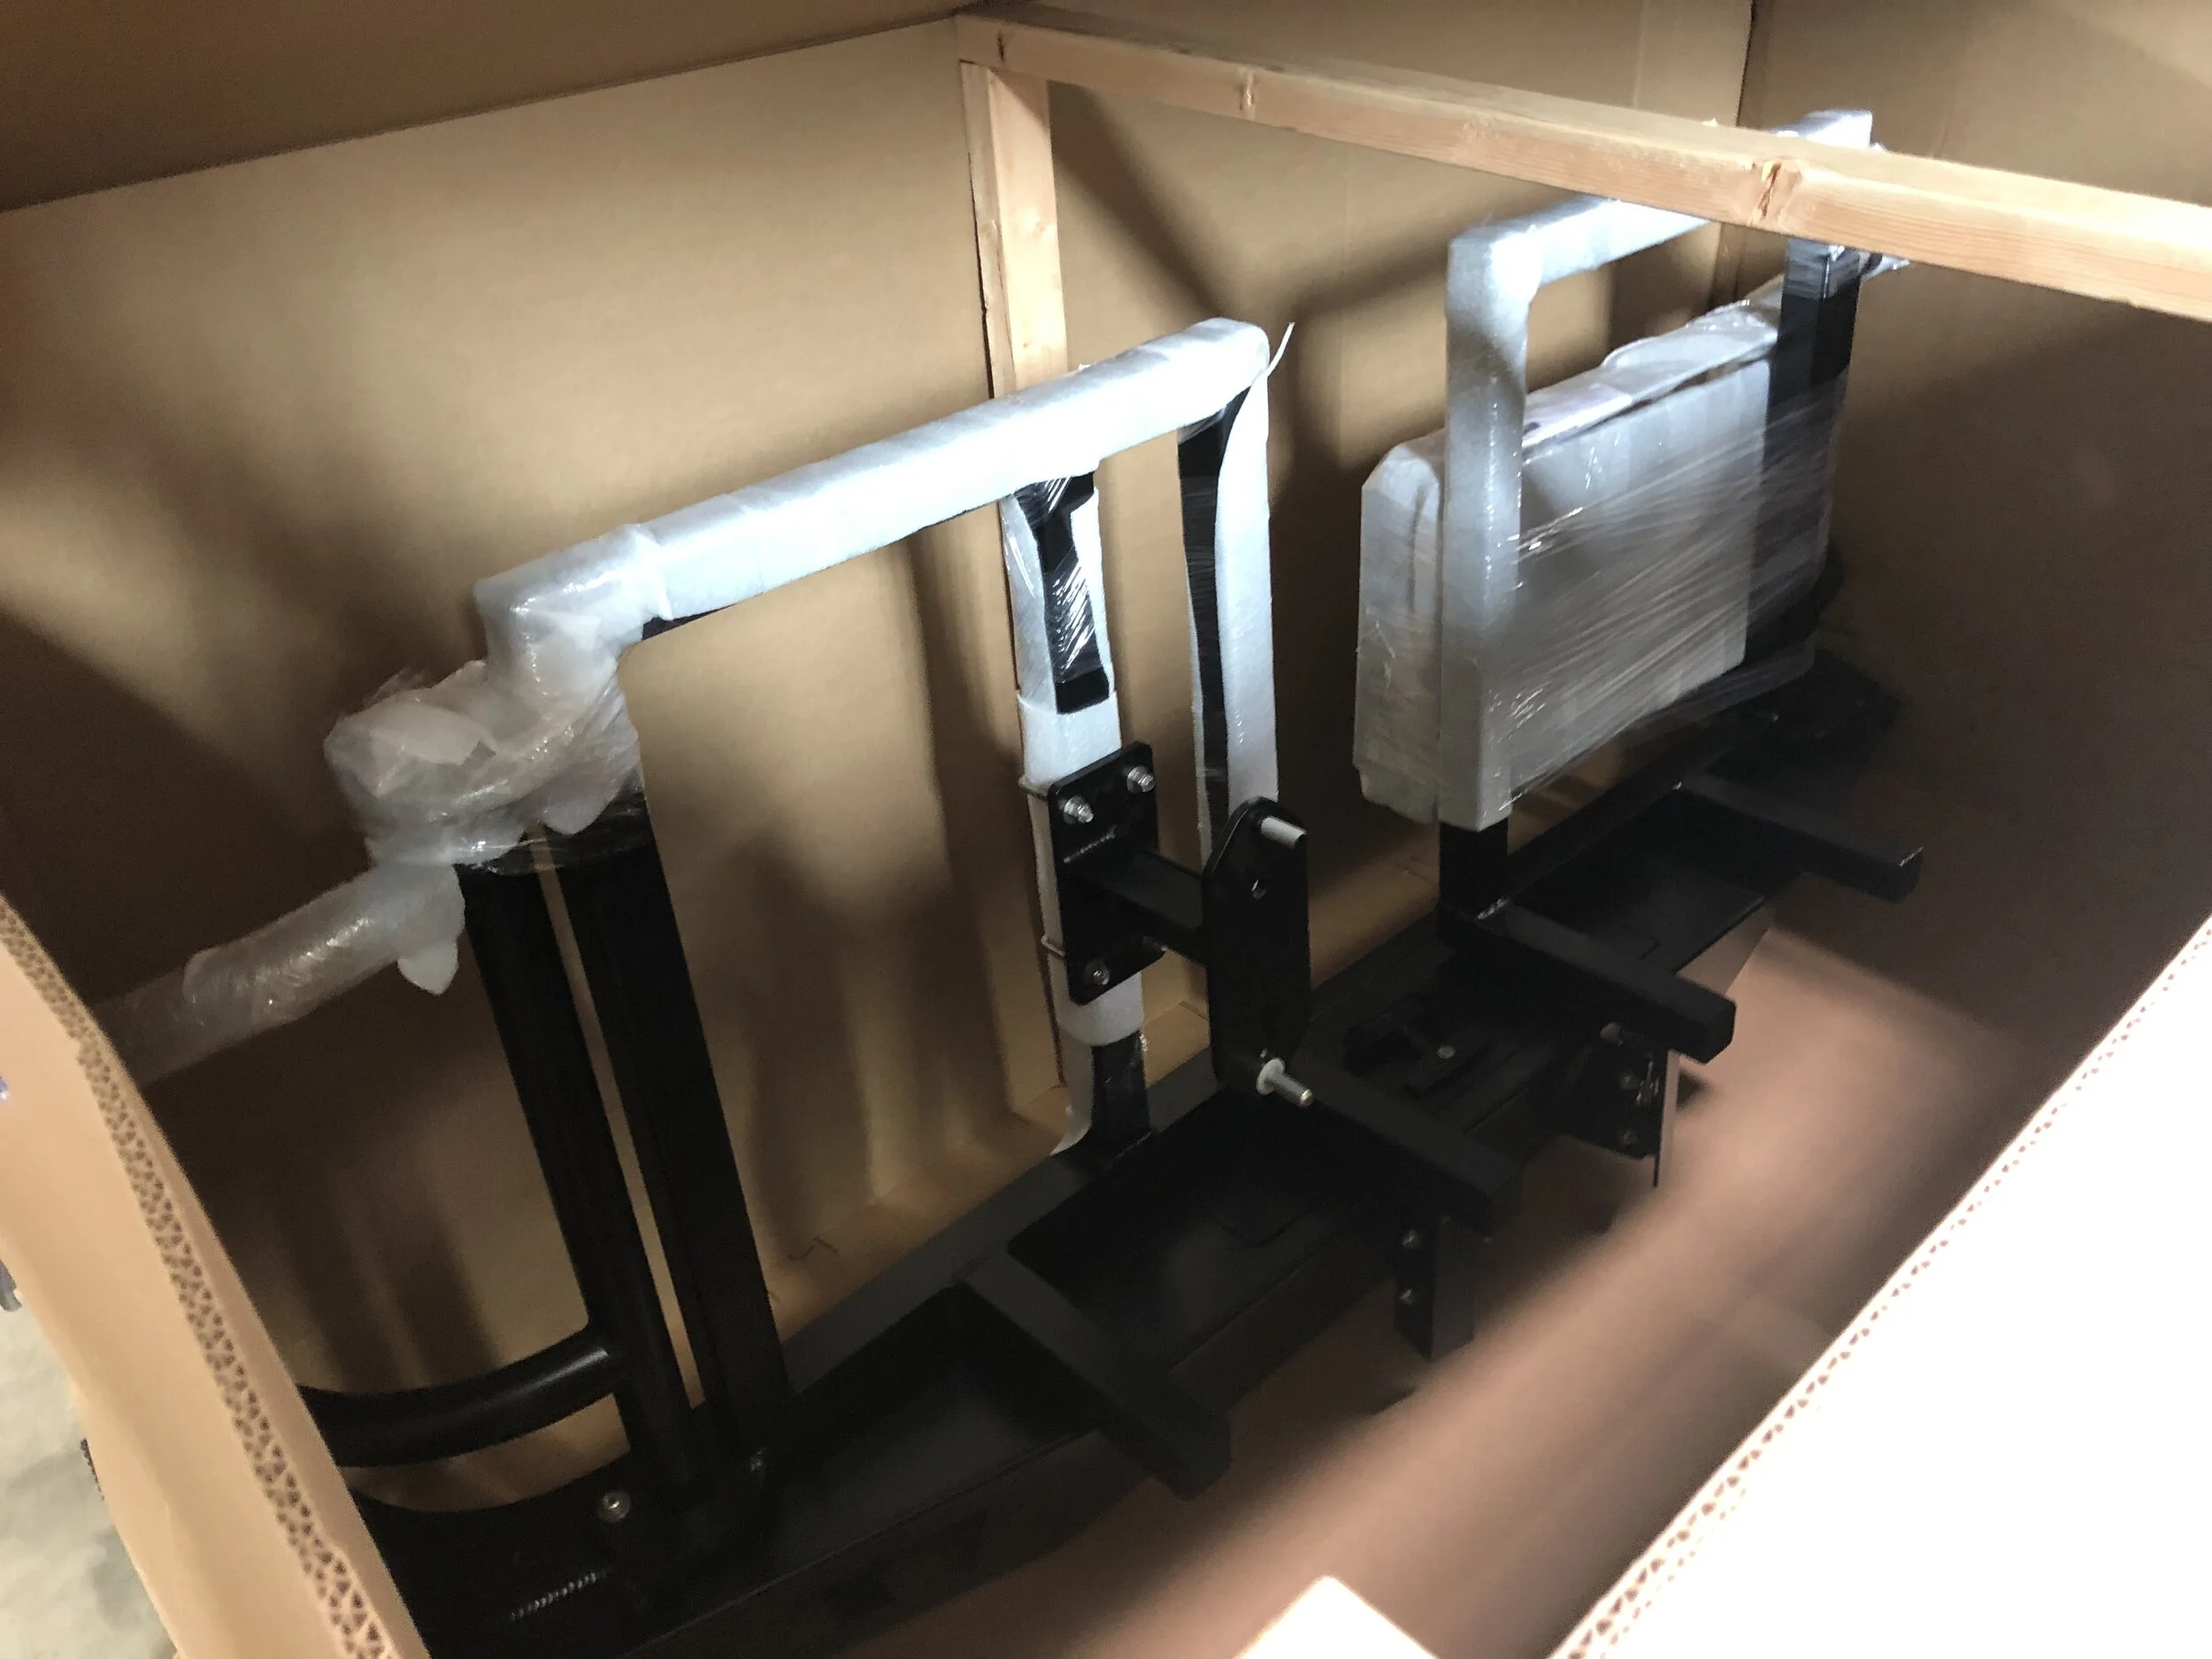
Day 3 (Tire Mount & Storage Box): The tire mount came pre-installed installed on the driver’s side in a unspecific position so that only took a little bit of hardware loosening and tightening to get the new full size spare mounted on the swing arm. Next I was ready to install the Aluminess Deluxe Box with the standard door. We choose this box because it had the most space and seemed to be the most utilitarian. The box installation was a bit more involved than the wheel mount because you have to align the box to you preferred location and then drill mounting holes through both the box and the swing arm.

The Aluminess Deluxe Box before its introduction to the driveway.
In the process of mocking up the mounting. location I turned away for a moment and the box slid off the swing arm with the slight lean in my driveway. Kaboom!! The big aluminum box landed face first on the concrete driveway. Not even a mile down the road and I though the worst. After cringing and thinking the worst I picked up the box to discover it only had a few scratches in one corner. The gear I choose is going to face some adversity at some point, so even though I didn’t want to test the durability out of the gates I felt a bit reassured.
I quickly learned my lesson and with a cam strap to hold the box in place I was able to drill holes for the hardware. With each new hole I inserted the bolts with nuts loosely tightened to make sure nothing moved in the process. Once the holes were all set I got my anti-seize and silicon ready for the final box installation. A big dab of silicone at the outside, inside, and in-between has proven waterproof so far after a year in the PNW. We also opted for the bolt on rails to top off the box and. those have come in handy on more than one occasion. The installation was similar in that you have to drill the holes, but it was pretty easy and straight forward.
Once the install was complete I had a chance to stand back and while the bumper did add a bunch of storage along with a full size spare it looked pretty damn good!
Use:
We’ve now had the Aluminess rear bumper for about a year and a half and have been very impressed with it’s durability and functionality. For the most part we use it as our full size spare mount and as the storage box for all our tools, recovery gear, tarps, and random this-n-that needed for camp setup or breakdown. Although the upper rails for the box seem bit expensive, they are well worth the cost and have been super helpful as the perfect spot for our grill whether it’s clean or dirty. The shelf was another handy little add on that doesn’t seem like much in the big package, but has come in handy for organizing the gear. I’ve gone around and checked all the hardware a few times and everything has stayed nice and tight. The bumper also has a huge amount of flat space on top that’s enough to sit on and is much easier to stand on when reaching on the roof for gear. The big locking storage compartment is an added bonus that I regularly forget about until i’m looking for my wheel chocks.
Pros:
Lightweight Design, Easy Installation, and Service. The added storage has opened up a good amount of space inside the van for all sorts of stuff including the addition of another pup, Little River, to our family. Although we haven’t had to use it yet…knock on wood, having a full size spare tire is also a layer of reassurance and comfort going down the more rugged trails we encounter. This is a product and company that I would endorse to anyone looking for the perfect bumper storage solution.
Cons:
I’m thrilled with the product and the service. The only call-out would be that after missing essential parts for the installation were shipped overnighted I found that more finishing parts were also missing. Aluminess was quick to fix the problem and stood behind their product, so it really only built my confidence in the company.
What’s Next?:
Aluminess offers a wide range of accessories from bumpers to roof racks and ladders for all sorts of vans. Our current front bumper is nice and has a clean look to it, but it we plan to install winch we’ll pull the trigger on their front bumper. The drivers side ladder has also been a tempting purchase, but the rear bumper offers quite a few sturdy climbing point to get on the roof as well.